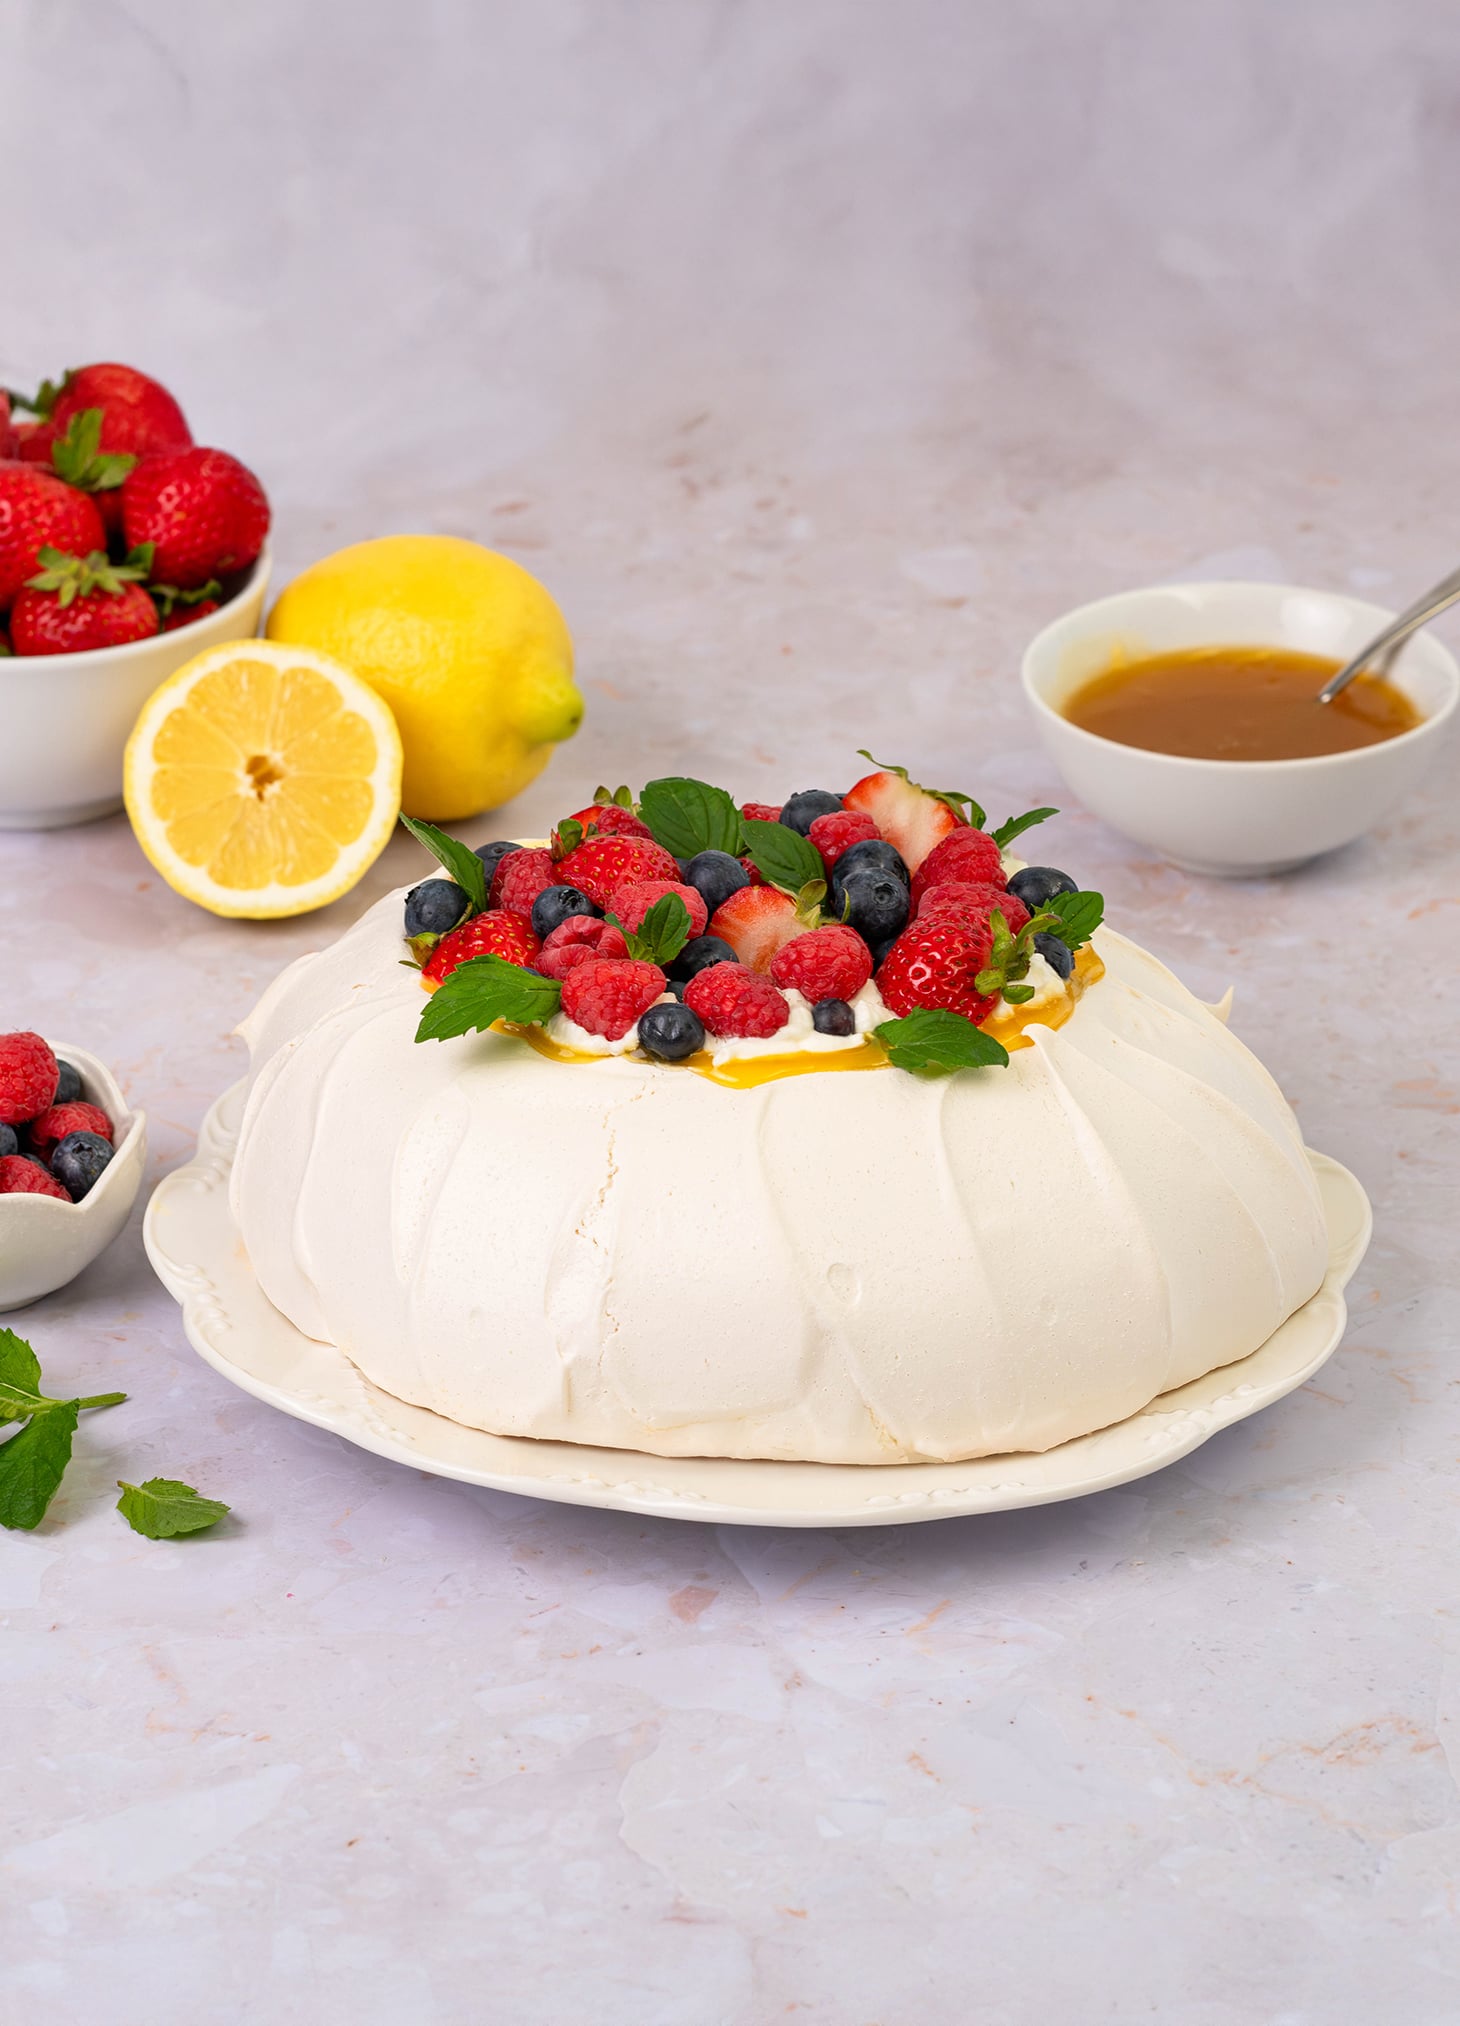
Lemon Berry Pavlova
A Showstopping Lemon Berry Pavlova your Family will Love
If there is one dessert that always manages to impress guests, it’s pavlova. Light, airy, and elegant, this classic dessert features a crisp meringue shell with a soft, marshmallow-like center that practically melts in your mouth. While it looks like something straight from a bakery display case, pavlova is surprisingly simple to make and requires only a handful of ingredients.
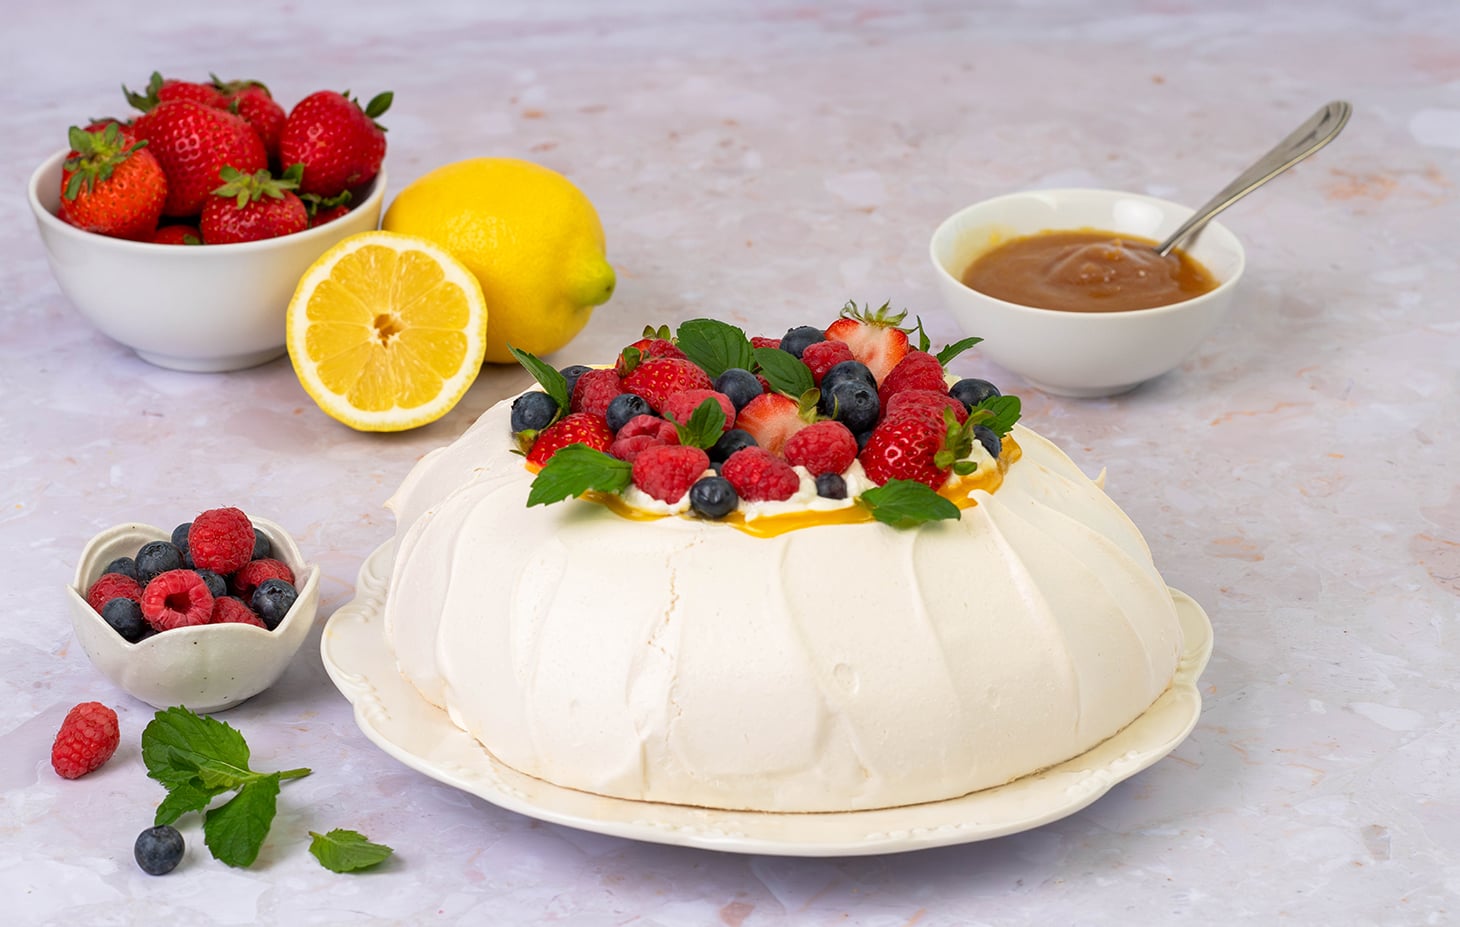
This Lemon Berry Pavlova is one of my favorite desserts to serve for spring and summer gatherings. Topped with homemade lemon curd, freshly whipped cream, and a colorful assortment of berries, it’s the perfect balance of sweet, tart, creamy, and crisp. The vibrant berries and bright citrus flavors make it feel refreshing and light, even after a big meal.
What I love most about pavlova is that it embraces imperfection. Unlike layer cakes that require precise frosting techniques, pavlova is meant to have a rustic, natural appearance. A few cracks here and there only add character and create little pockets for extra cream, lemon curd, and fruit.
Whether you’re hosting spring or summer brunch, celebrating Mother’s Day, planning a baby shower, or simply looking for a beautiful dessert to share with family and friends, this Lemon Berry Pavlova is guaranteed to be the centerpiece of the table.
Related Recipe: Orange Cake
What is Pavlova?
Pavlova is a meringue-based dessert believed to have originated in either Australia or New Zealand and was named after the Russian ballerina Anna Pavlova. The dessert is known for its unique texture: crisp and delicate on the outside while remaining soft and fluffy inside.
Unlike traditional meringues that are baked until completely dry, pavlova retains a soft center that creates a wonderful contrast with fresh fruit and whipped cream. The result is a dessert that feels light and elegant while still being incredibly satisfying.
Why You’ll Love This Dessert
There are plenty of reasons this pavlova deserves a spot on your dessert table:
- Naturally gluten-free
- Perfect for entertaining
- Beautiful presentation with minimal decorating
- Light and refreshing for warm-weather gatherings
- Easy to customize with seasonal fruits
- Can be prepared in stages ahead of time
- The combination of tart lemon curd and sweet berries makes every bite balanced and flavorful.
Ingredient Variations
One of the best things about pavlova is how easy it is to adapt.
- Try Different Fruits. While strawberries, raspberries, and blueberries create a beautiful berry combination, don’t hesitate to experiment with other fruits throughout the year.
- Fresh blackberries, sliced kiwi, cherries, peaches, nectarines, passion fruit, and mango all pair beautifully with the crisp meringue and creamy topping.
- Switch Up the Citrus: Lemon curd provides bright acidity, but you can also use lime curd, orange curd, Meyer lemon curd, or even passion fruit curd for a slightly different flavor profile.
- Add Fresh Herbs: For an elevated presentation, garnish with fresh mint, lemon balm, or even edible flowers.
Simple Tips for Success
Pavlova is simple, but a few small details can make a big difference.
- Use Fresh Eggs: Fresh egg whites whip up beautifully and create a more stable meringue structure.
- Make It on a Dry Day: Humidity can affect meringue, making it softer than intended. If possible, avoid making pavlova during especially humid weather.
- Be Patient: One of the secrets to a successful pavlova is allowing it to cool gradually. A slow cooling process helps prevent excessive cracking and collapse.
- Don’t Stress About Cracks: Many first-time bakers worry when they see cracks in their pavlova. In reality, small cracks are completely normal and often become hidden once the toppings are added.
- Assemble Before Serving: For the best texture, add the lemon curd, whipped cream, and berries shortly before serving. This helps maintain the crisp exterior of the pavlova.
Serving Suggestions
- This dessert is stunning enough to serve on its own, but there are plenty of ways to elevate the experience.
- For brunch, pair it with coffee, tea, mimosas, or fresh lemonade.
- For summer entertaining, serve it alongside grilled fruit, sparkling beverages, or a chilled rosé.
- For holidays and celebrations, garnish with edible flowers, fresh herbs, or additional citrus zest for an extra-special presentation.
- Its beautiful appearance makes it a natural centerpiece for bridal showers, baby showers, Easter celebrations, Mother’s Day brunches, and summer dinner parties.
Make-Ahead and Storage Tips
One of the reasons I love serving pavlova for entertaining is that much of the work can be done ahead of time.
- The pavlova shell can be prepared a day or two before serving and stored in an airtight container at room temperature.
- The lemon curd can be made several days in advance and refrigerated until needed.
- Whipped cream can be prepared a few hours ahead and stored in the refrigerator.
- For the freshest presentation, wait until just before serving to assemble the dessert.
- Once assembled, leftovers should be refrigerated and enjoyed within a day. The meringue will soften over time, but the flavors remain delicious.
FAQs
Small cracks are completely normal and are part of pavlova’s rustic charm. Larger cracks can occur from rapid temperature changes, overbaking, or cooling too quickly.
Absolutely. The shell can be made up to two days ahead. Store it in an airtight container and assemble shortly before serving.
Humidity is usually the culprit. Meringue naturally absorbs moisture from the air, which can make it feel sticky.
Yes! While the lemon curd adds a bright, tangy flavor that balances the sweetness of the meringue, you can easily substitute it with other fillings. Try passion fruit curd, orange curd, fresh fruit preserves, or simply add extra whipped cream and berries. The pavlova is incredibly versatile and can be customized to suit your taste or the season.
Lemon Berry Pavlova
- Prep Time: 45 minutes
- Cooking Time: 2 hours
- Cook Time: 90 minutes
- Total Time: 4 hours 15 minutes
- Yield: 8–10 1x
- Category: Dessert
- Method: Baking
Description
This Lemon Berry Pavlova is a light and elegant dessert featuring a crisp meringue shell with a soft, marshmallow-like center. Topped with silky homemade lemon curd, freshly whipped cream, and a colorful mix of strawberries, raspberries, and blueberries, it’s the perfect dessert for spring celebrations, summer gatherings, and special occasions. Beautiful, refreshing, and naturally gluten-free, this showstopping pavlova is sure to impress.
Ingredients
Ingredients for the Pavlova:
- 6 large egg whites, room temperature
- 1 1/2 cups superfine or caster sugar
- 1/2 teaspoon cream of tartar
- 1 1/2 teaspoons white vinegar
- 1 teaspoon pure vanilla extract
For Lemon Curd: - ¾ cup lemon juice
- ¾ cup granulated sugar
- ½ cup butter, sliced in cubes
- 3 eggs
- 1 tablespoon lemon zest
For the Whipped Cream - 1 cup heavy cream
- 1/4 cup powdered sugar
- 1 teaspoon vanilla bean paste or pure vanilla extract
For Serving - Fresh strawberries
- Raspberries
- Blueberries
Instructions
Directions for the Pavlova:
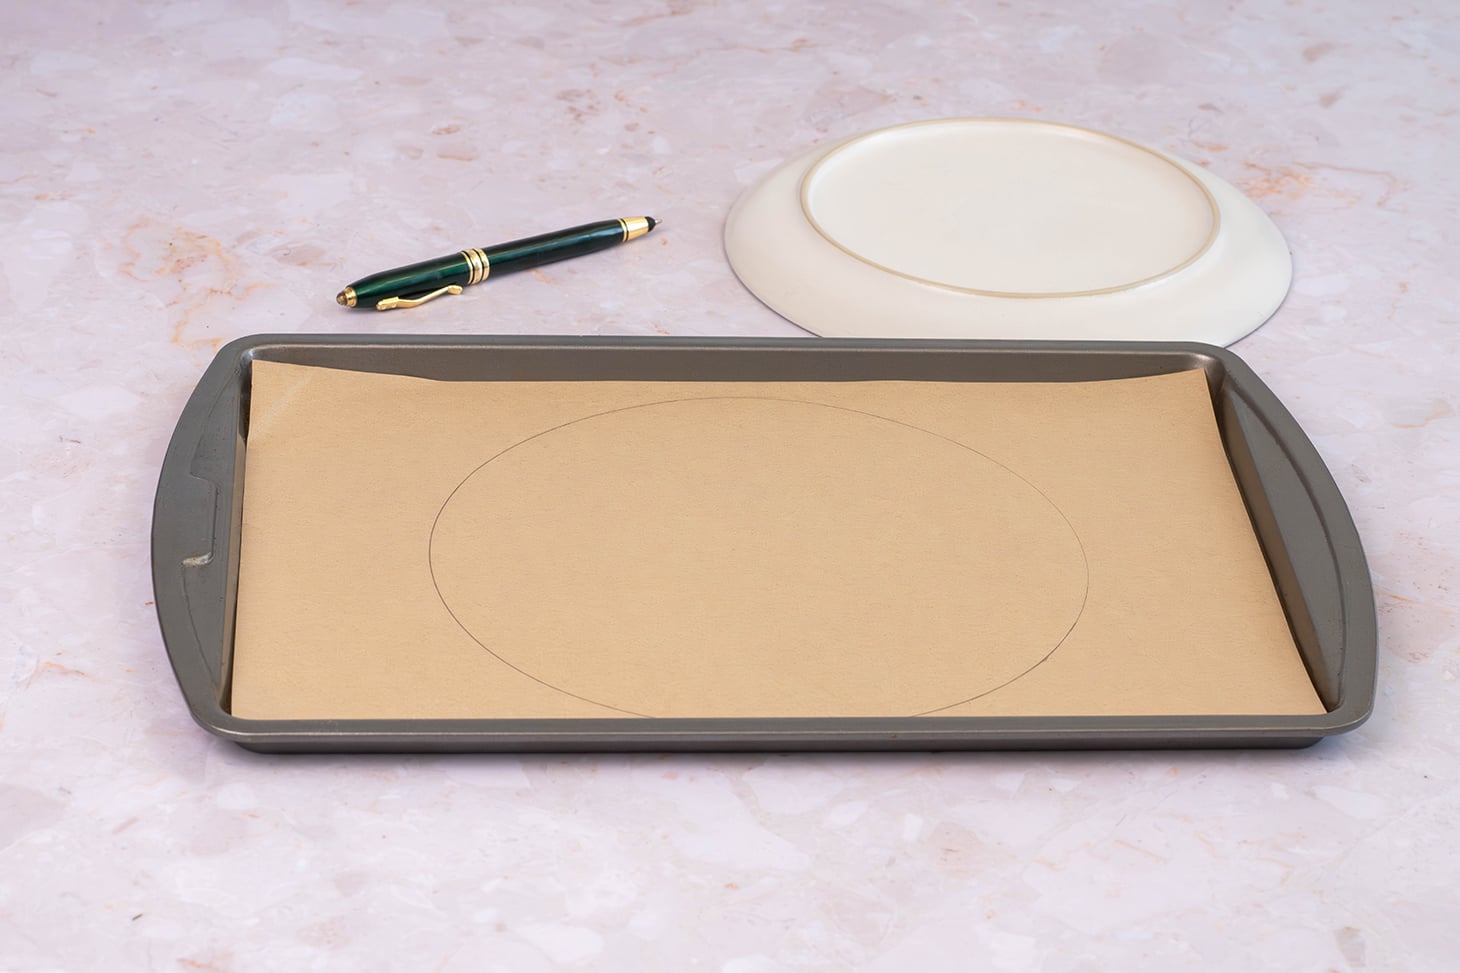
- Preheat the oven to 250°F. Line a large baking sheet with parchment paper. Draw a 6-inch circle onto the parchment paper, then flip the parchment over so the ink or pencil side is underneath.

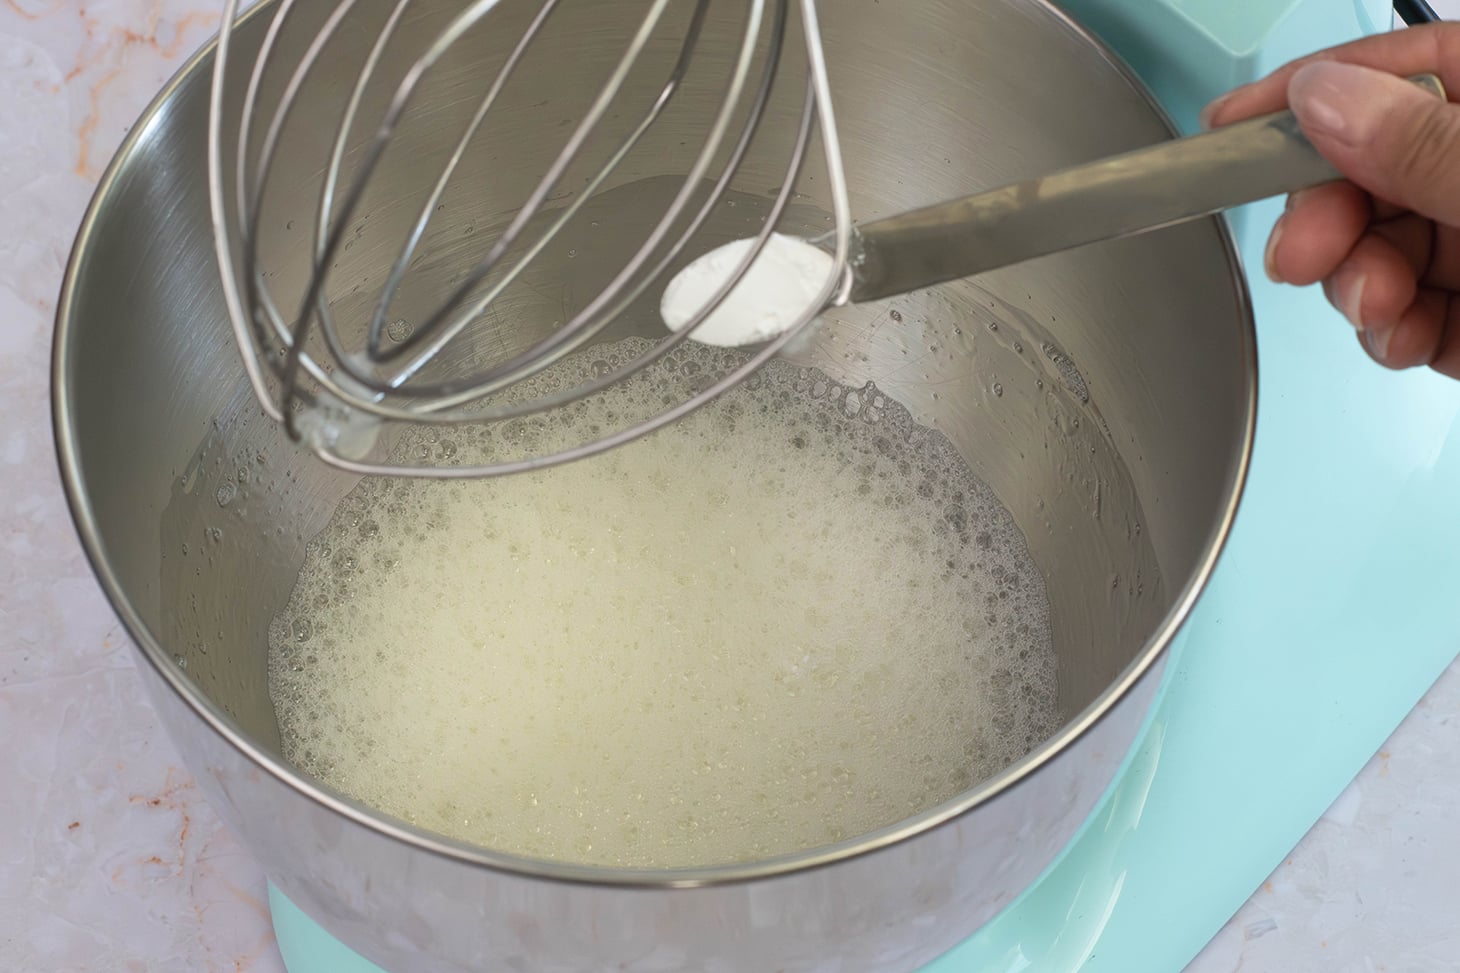
- In the bowl of a stand mixer fitted with the whisk attachment, beat the egg whites on medium speed until foamy. Add the cream of tartar and continue beating until soft peaks begin to form.
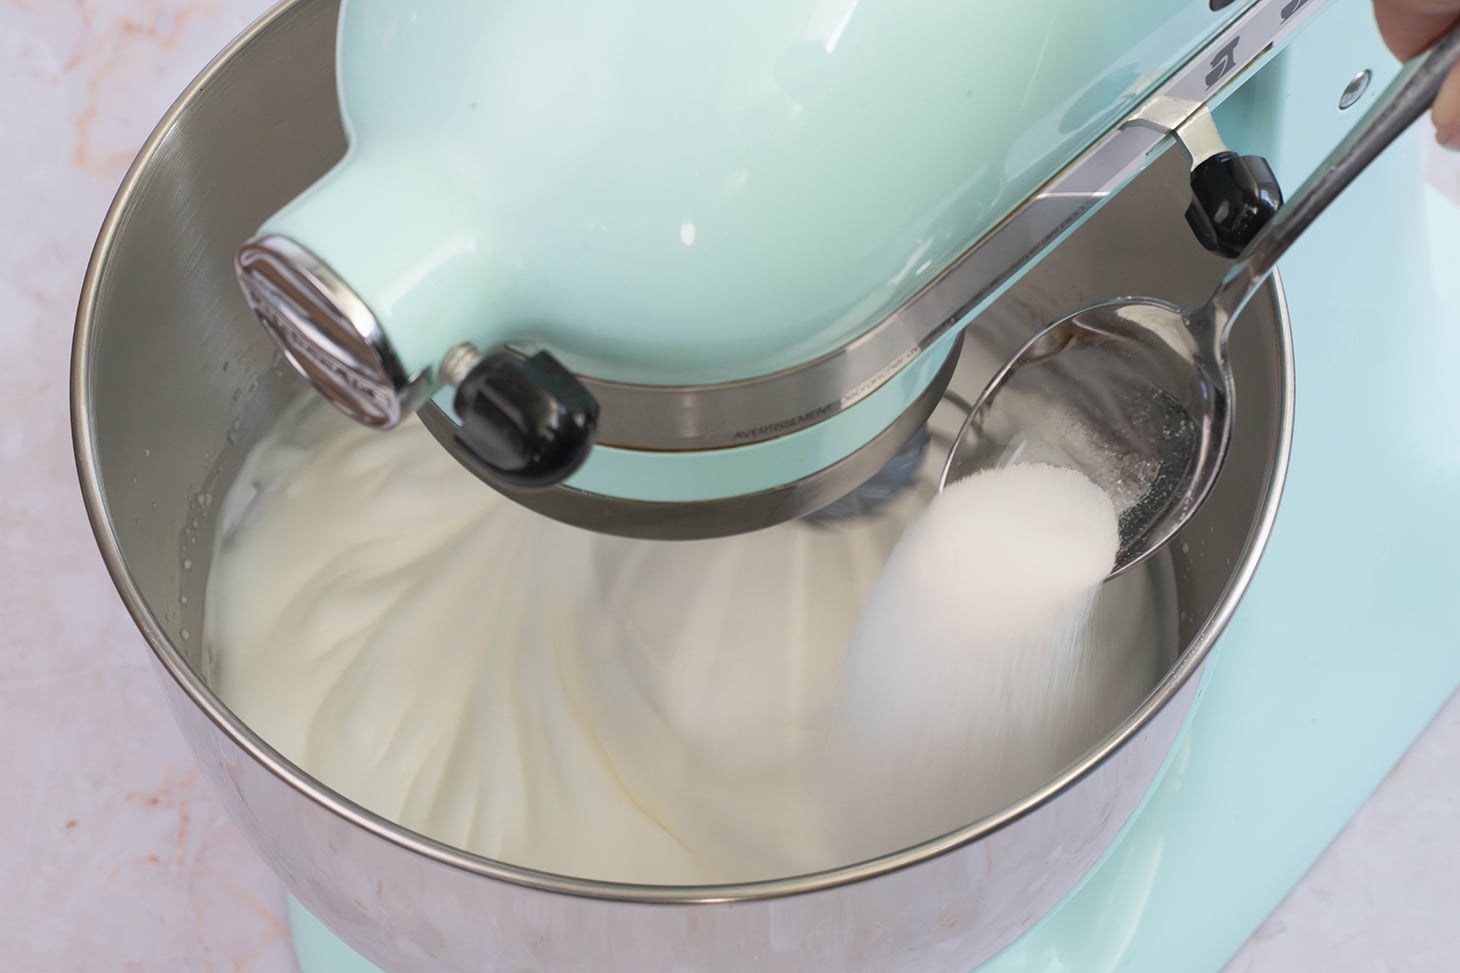
- Increase the mixer speed to medium-high and slowly add the sugar, 1 tablespoon at a time, allowing it to incorporate before adding more. Continue beating until the meringue is thick, glossy, and holds stiff peaks. Rub a small amount of meringue between your fingers; if it feels grainy, continue mixing until the sugar is fully dissolved.
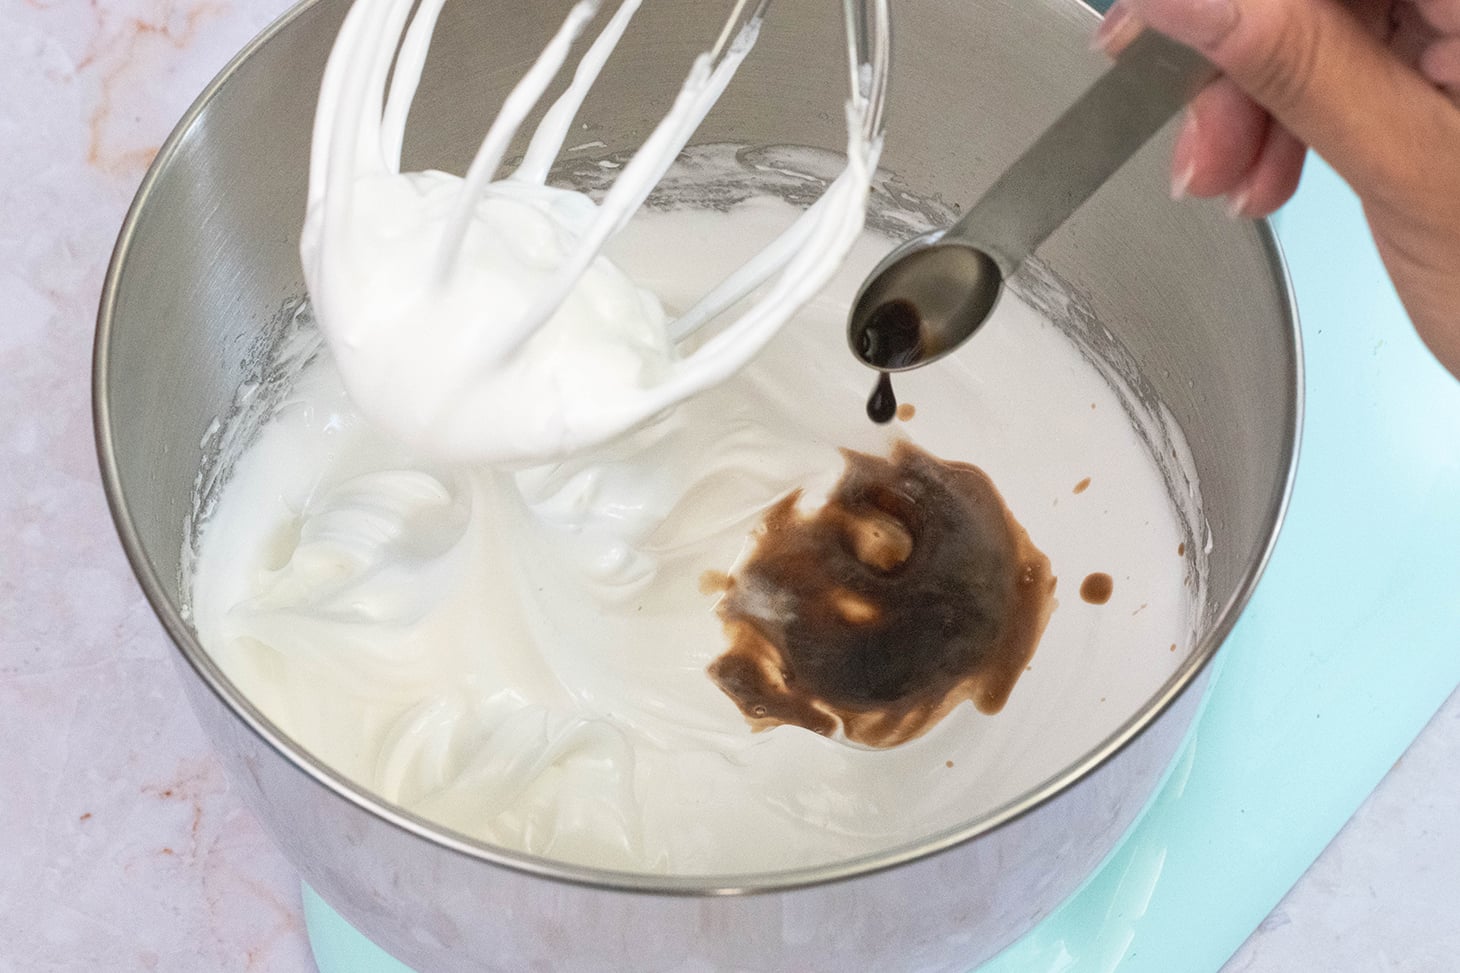
- Add the vinegar and vanilla extract and mix for 30 seconds more.
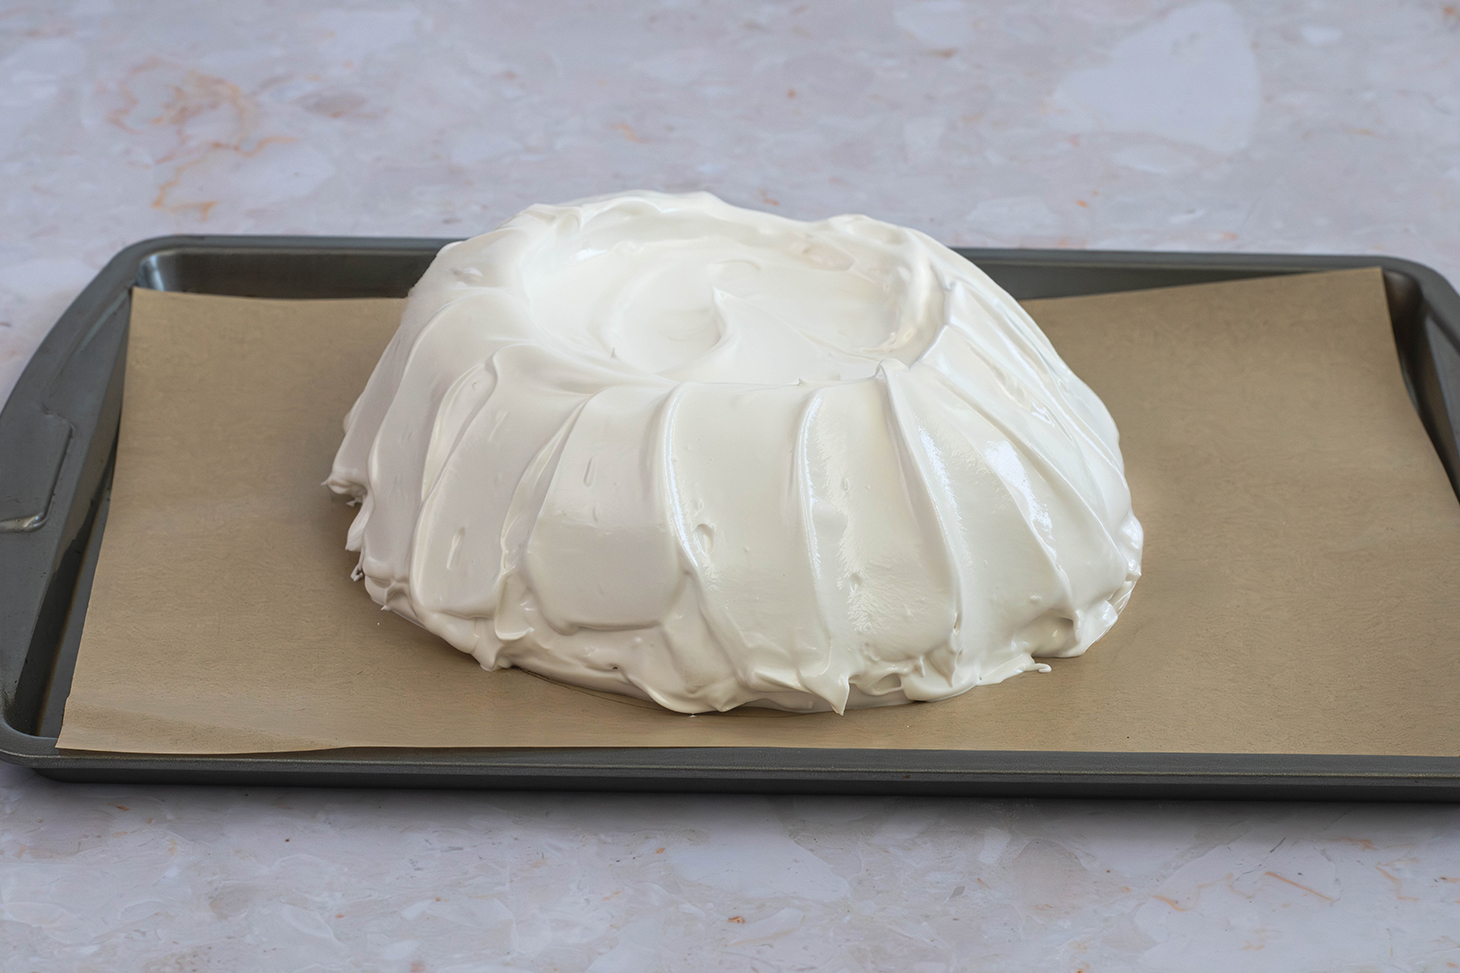
- Spoon the meringue into the center of the prepared circle. Using a spatula or the back of a spoon, shape the meringue into a tall mound, keeping the sides thick and the center slightly lower to create a shallow well for the filling. Use upward strokes around the sides
- Bake for 1 hour and 30 minutes, or until the outside feels dry and crisp. The pavlova should remain pale in color, with only slight cracking. Turn the oven off and leave the pavlova inside with the oven until completely cooled.
Directions for Lemon Curd:
- Combine lemon juice, sugar, butter, eggs and lemon zest in a medium saucepan over medium-low heat. Stir until mixture thickens. When bubbles begin to form, remove saucepan from heat; approximately 5 minutes. Transfer to a large bowl. Note: If eggs have curdled, use a strainer when transferring to bowl. Let cool.For the Whipped Cream
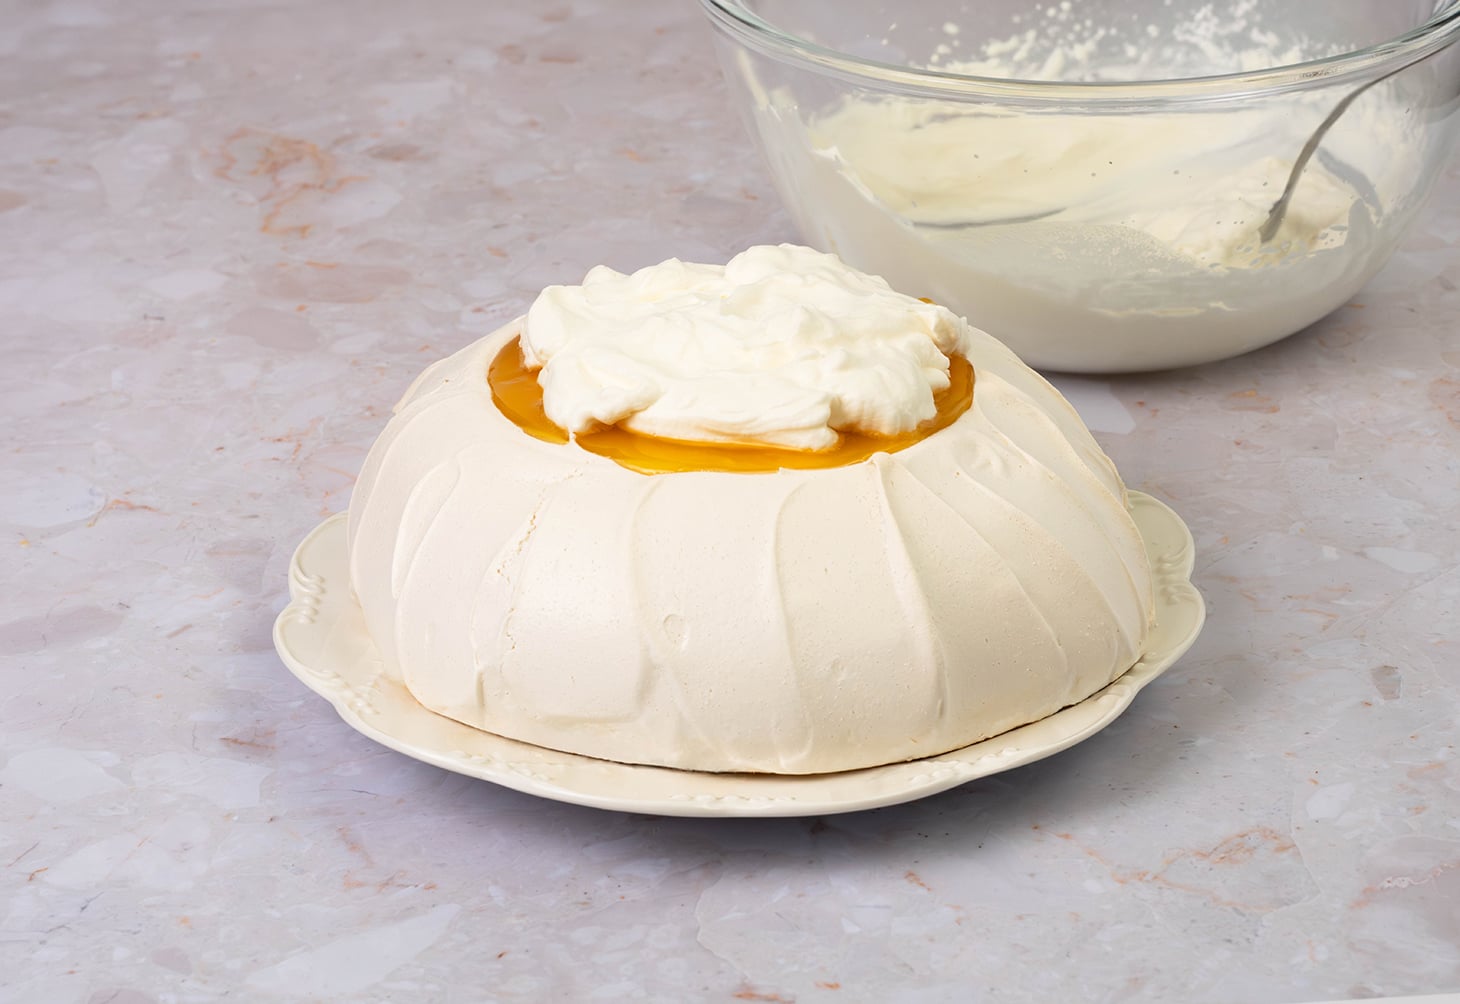
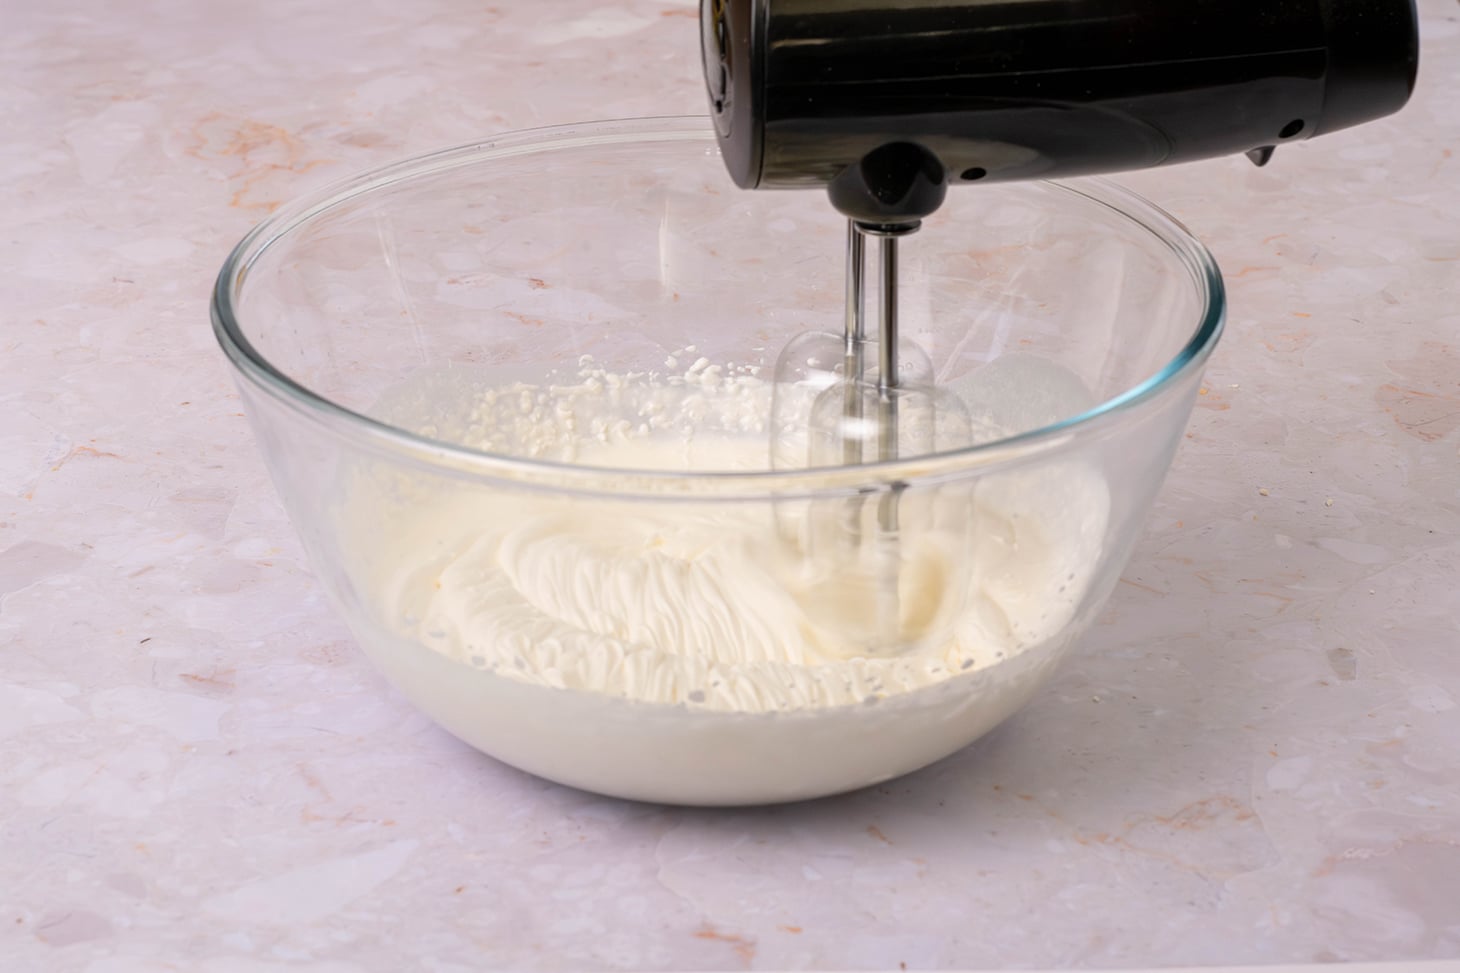
- In a large mixing bowl, combine the heavy cream, powdered sugar, and vanilla bean paste. Using an electric mixer, beat until soft, cloud-like peaks form. Be careful not to overwhip.Assemble
- Spoon the lemon curd on the center of the cooled pavlova and gently spread. Top with whipped cream and finish with fresh berries piled generously on top. As the pavlova sits, the crisp top may naturally crack or collapse slightly under the weight of the cream and berries, creating the perfect rustic well for even more filling and fruit. Serve immediately.


 Assemble