Setting up my Herb Seed Starter #DigIn
This is a sponsored post written by me on behalf of The Home Depot.
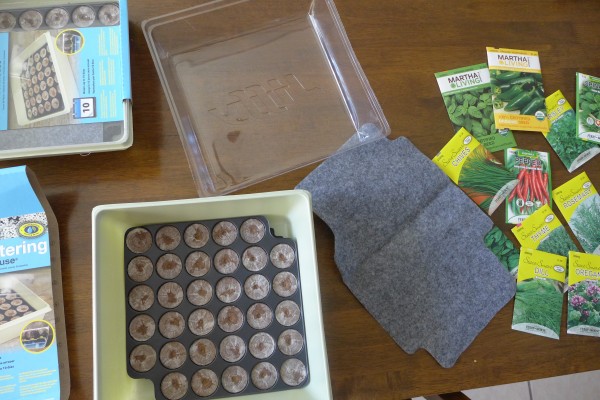
Ok. It’s time to get down to this seed starting business. After doing some research on The Home Depot’s Garden Club and by recommendation of the Home Depot sales associate, I decided to purchase a Jiffy Self-Watering Greenhouse. My main concern about this project was not having enough space for set-up and maintenance but that was all resolved after realizing that there are lots of greenhouse variations available at The Home Depot. There was a perfect seed starer just for me. I was set!
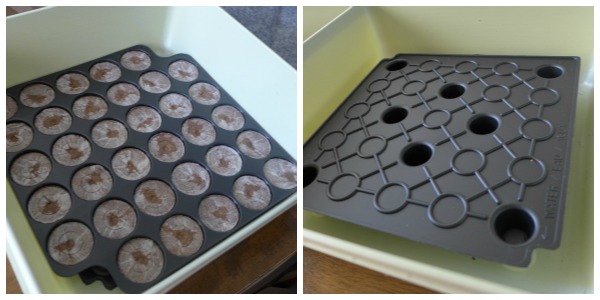
Setting up this project at home was extremely easy. So easy, that I was able to assemble my new greenhouses with my four-year-old on the kitchen table. Since the seed starter/greenhouse included dried soil pellets compacted in mesh pockets, there was no mess!
After taking the greenhouse apart and familiarizing myself with the components, I followed the simple instructions on how to get this project underway.
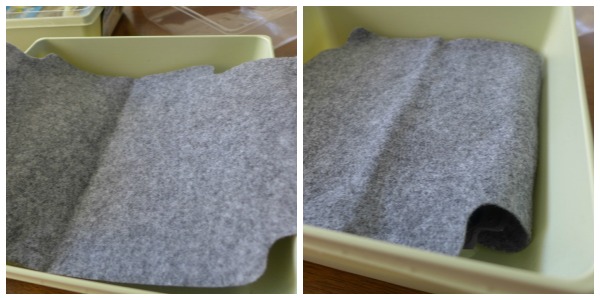
The self-watering mat is what makes this greenhouse so convenient. After placing it in the base of the greenouse in such a way that it is aligned with both the plastic tray and the pellet tray, I added approximately 12 cups of water.
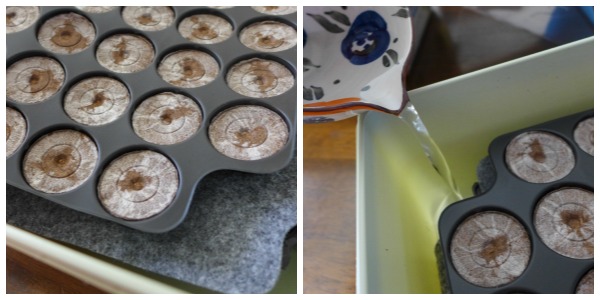
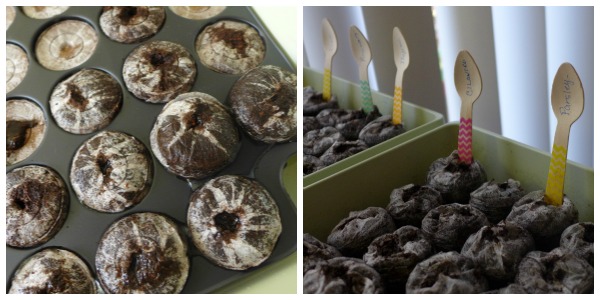
Like magic, the soil pellets began absorbing the water from the soaked self-watering mat. I loved the face of amusement my son made as he watched the pellets puff up. Once all the pelletes expanded to 1 – 1 1/2 inches tall, it was time to plant the seeds.
Using a chopstick, I pulled back the mesh from each pellet, fluffed the soil and made a small indentation in each soil pocket. My son then proceeded to place the seeds inside each pocket and I followed, still using the chopstick, gently covering with soil.
Since I was out of frozen pop flat sticks, I used small wooden spoons to label each row. It worked perfectly.
So that’s it! Easy, right? There are many different seed starter kids available at The Home Depot. One perfect, just for you. Stop by and check them out, ask questions or visit The Home Depot’s Garden Club to see what peaks your interest. I guarantee you will find your next fun home project with just a click of a mouse.
It’s home improvement time, and The Home Depot has everything you need to #DigIn for Spring. No matter what projects you want to tackle, they have great values on all you need. They’re ready to help you with renovation ideas and expert advice, too.
Get over $300 in email exclusive savings each year, sneak peeks on new products, monthly lawn & garden ideas for your region and access to The Home Depot’s gardening experts. Click here to join the world’s largest garden community today! Or go to http://gardenclub.homedepot.com/ to see some of the many benefits of membership.
This is a sponsored post written by me on behalf of The Home Depot.
Otra vez… en español!

Este es un post patrocinado, escrito por mí en nombre de The Home Depot.
Ok. Es hora de empezar nuestro proyecto. Después de hacer algunas investigaciones en el Garden Club de The Home Depot, y por recomendación del vendedor de la tienda, me decidí a comprar un invernadero Jiffy de Auto-riego. Mi preocupación principal de este proyecto era no tener suficiente espacio para la instalación y mantenimiento. Todo se resolvió después al darme cuenta de que hay una gran variedad de invernaderos disponibles en The Home Depot. Encontré un invernadero perfecto para mí. Estamos listos para empezar!

La instalación de este proyecto en casa fue muy fácil. Tan fácil, que fui capaz de incluir a mi hijo de cuatro años como ayudante y los dos configurar el invernadero en la mesa de la cocina. Todo fue muy fácil. Dado que el invernadero incluye pastillas de tierra seca compacta en bolsitas de de malla, no hubo ni tierra ni agua derramada!

Después de desarmar el invernadero y familiarizarme con los componentes, seguí las instrucciones sencillas sobre cómo arrancar el proyecto.
La alfombrilla de auto-riego es lo que hace que este invernadero sea tan conveniente. Después de colocarla en la base del invernadero de de tal manera que esté alineado tanto con la bandeja de plástico y la bandeja de pastillitas de tierra, añadí aproximadamente 12 tazas de agua.

Como magia, las pastillitas de tierra comenzaron absorber el agua de la alfombrilla empapada de auto-riego. Me encantó la cara de diversión mi hijo hizo cuando vio las pastillas esponjarse. Una vez que todas las pastillas se expandieron a 1 – 1 1/2 pulgadas de alto, fue el momento de plantar las semillas.
Con un palillo chino, abrí la malla de cada pastilla e hice un pequeño huequito en la tierra de cada una. Mi hijo procedió a colocar las semillas dentro de cada bolsillo y yo después cubría las semillitas ligeramente con tierra.
Como no tenia palitos de paleta planos, use pequeñas cucharas de madera para etiquetar cada fila. Funcionó a la perfección.
Así que eso es todo! Fácil, ¿no? Existen muchos tipos de kits para invernaderos de semillas disponibles en The Home Depot. Hay uno perfecto, sólo para ti. Visita la tienda y haz preguntas o visita el Garden Club de The Home Depot para ver todos los proyectos que te puedan interesar. Te garantizo que encontrarás tu próximo proyecto de hogar con un simple clic del mouse.

Es la temporada perfecta para las renovaciones de los espacios al aire libre de tu casa., y The Home Depot tiene todo lo necesario para la primavera. No proyectos tengas en tu lista , porque The Home Depot tiene ofertas estupendas en lo que necesites. Ellos están listos para ayudarte con ideas de .
Obtén más de $ 300 en ahorros exclusivos por email cada año, adelantos en nuevos productos, ideas cada mes para tu césped y jardín en tu región y el acceso a expertos en jardinería de The Home Depot. Has clic aquí para unirte a la comunidad jardinera más grande del mundo! O visita a http://gardenclub.homedepot.com/ para ver algunos de los muchos beneficios de ser miembro.
Este artículo es patrocinado y escrito por mi en nombre de The Home Depot.


